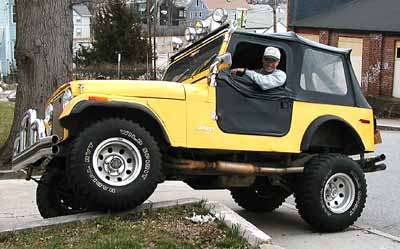
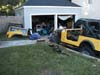
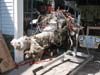
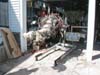
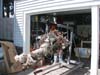
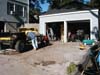
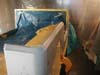
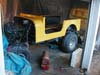
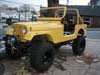
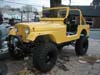
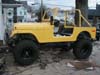
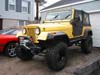
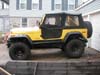
From this:
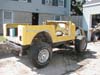
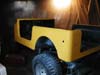
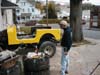
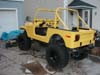
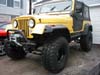
To this:
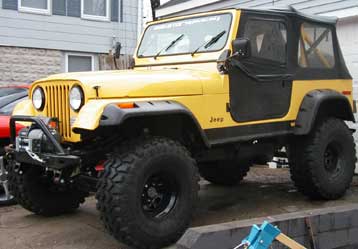
(In just 4 short months!)
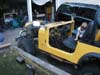
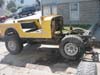
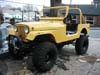
This is my 1976 Jeep CJ-7 with a factory AMC 304 V-8 and a Quadratrac limited slip, full time 4 wheel drive transfer case. I have recently begun the process of completely rebuilding it and will do my best to document its rebuild here. This web site is primarily here for our family to come look at, but none of my family really cares about Jeeps or rebuilding vehicles. I'm not sure who'll ever even look at this page, but I've learned so much about Jeeps from people like me who put their stories on the web that I've decided to follow suit. If you get ideas or helpful tips from here, then great.
It's my daily driver, so I didn't want want to tear it down completely then be a one car family for months while I worked on it. I decided to buy a new frame and start a rebuild from there. I planned to fix any problems with the new frame and build a new suspension under it. When it was all ready to go I'd pull the body off the one I'm driving, send it to the body shop, then swap the drivetrain over while I waited.
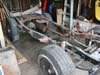
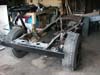
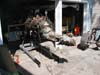
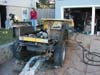
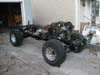
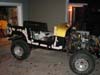
With my new plan in mind, I stopped by e-bay to see what was available up here in the northeast. The frame you see below is what I picked up from a guy who calls himself "Jolly Green Jeeps" and operates out of Pennsylvania. I paid $150 for it, plus the gasoline to drive 4 hours there to pick it up and then back again.
The frame was advertised as needing only a little repair work on most of the body mounts. When I got to PA and looked it over, it looked like it might need an a little work on the passenger side rear spring mounts too, but I was not unhappy with what I saw.
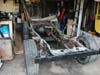
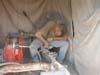
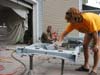
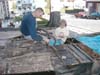
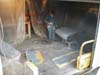
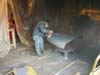
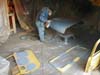
When I got it home, I built a tent in my garage to do the sandblasting in. The idea was to keep as much sand and dust out of the garage as possible. I guess it worked to keep sand from blowing all over the place, but it sure didn't prevent dust from leaking out! I'll be cleaning dust off everything in there for years.
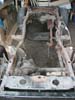
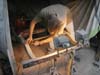
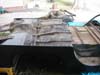
As I was blasting, I also uncovered much more rot than what was visible with the dirt and old paint covering it. The body mounts I knew about and wasn't worried about. The rear spring mounts are a different story. I've always wanted a welder, but never had one until I started this project and bought a little Lincoln 110v MIG setup. I planned to do the body mounts and if any of them weren't great quality welds, I figured I'd know it if any broke and could fix it before my life was ever in danger. With spring mounts I couldn't see trusting my life to my own inexperienced welding, especially since much of the frame needed to be reconstructed all the way around both mounting points for the passenger side rear spring.
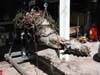
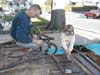
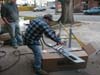
I found a local guy to do the work for me, and ended up having him do the body mounts and everything since the price was right. It was easier and quicker for me to have him do it than for me to teach myself to weld while I'm working on a big project like this.
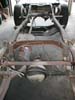
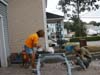
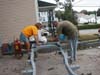
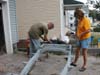
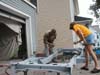
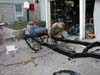
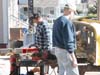
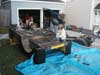
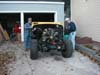
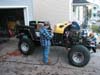
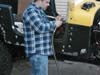
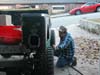
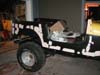
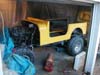
The pictures below are from the day I brought the frame home from the weld shop. It had gotten wet in the back up the pickup on the way to the welder's shop, and I had to do a little more blasting to do some final cleaning before paint.
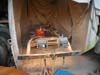
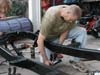
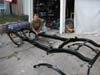
The pictures below are from that same Saturday. It was one of those rare days where every single project went perfectly and I got way more done in one day than I thought would be possible. I finished the final sand blasting within a couple of hours, then primed it with Krylon brand Zinc based rust blocker primer. I've always liked Krylon best for spray paint, and this stuff didn't let me down.
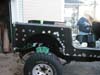
After the primer dried, I painted it with Eastwood's "Chassis Black." I've used it before on my old '69 Camaro and have been very happy with it.


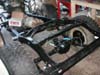
When the paint had dried I did most of the install for the Shackle Reversal System (S.R.S.) from Mountain Off-Road Enterprises (M.O.R.E.). The front was no problem, but I ran into a problem following their directions for the rear spring mount using the Revolver Shackles I want to use. If I followed their instructions, the revolver shackle would have hit the frame when it was installed, and may not even fit at all. Since the rear mount involves cutting a hole in the frame and welding in a tube for the bushings, I decided to wait to talk to some experts the next Monday.
When Monday came, I called Sam's Offroad where I bought the revolver shackles, and I called M.O.R.E. It turns out that neither group of guys has done the S.R.S. with revolver shackles for several years, and neither could tell me how to do it. I was referred to Curt at Metal Made-Rite, the inventor of the shackles. He told me the right way to place the hole in my frame is to put the Jeep back together on the new frame prior to every marking and drilling the hole. The idea is to have the full weight on the spring and let it slide along the frame, then put the shackle bushing tube right above the top of the spring. Makes sense to me, but it's a bummer for me that I have to wait until later to get this done. I wanted to see the setup now!
As a note, I want to make sure I don't sound displeased with the service at either Sam's Offroad or at Mountain Off-Road. They were both as helpful as they could be, they just couldn't remember how they had seen it done in the past. Rather than make something up and leave me with a bad setup, I was sent to the guy who would know the right answer. I don't believe you'll find a better price on revolver shackles than Sam has, and from everything I've read the S.R.S. is the very best shackle reversal available. I can't wait to try them on the trail!
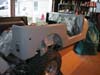
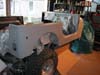
Well, having gotten the frame ready, it was time to get started on the body. I had met a guy earlier in the year who is a body man for a living and was working on starting his own shop. He doesn't have that shop yet, but does do cars at his home in the evenings. I don't know anything about body work, so I needed someone to do it for me. I met with him and came to agreement on what I think is a very reasonable price, then ordered sheet metal... Front floor pan patches for both sides, fenders for both sides, side panels for both sides, rear corner panels for both sides, a new windshield frame, and a tailgate. Wow, what a bunch of sheet metal!
I got all the sheet metal except the floor pans, from Krage Motorsports, and I'm very happy with their service, product, and prices. I found them based on a recommendation in a Jeep newsgroup and from my dealings so far, the recommendation was a good one. I've also ordered all new black body hardware and hinges from them, because I intend the Jeep to be yellow and black when I'm done, not yellow and stainless.
There's only one problem with my body man... He can't take the body alone, he needs a running vehicle so he can move it around in his garage. I really wanted to have the whole thing apart and painted one piece at a time. I don't need a super nice paint job, because I'm just going to take it out in the woods and beat it up, but at the same time, I don't want overspray on places it shouldn't be and incomplete painting on hard to reach places. I also wanted to swap the drivetrain over while the body was off.
I really spent some time thinking about this one. I want the good price he'd offered me, but didn't want the whole thing sprayed in one piece. I ended up telling one of the guys I work with about my quandary. He used to do body work for a living, so he offered to take a look at the Jeep and see what I wanted done. After looking it over, he told me I could do it myself without any problem, and offered to help me with the project and teach me how to do it. I'd always wanted to do the work myself, just knew it wasn't realistic to think I could do it myself without ever even having seen it done.
The pictures below are from the end of that very day he told me he'd help. I went home, ordered a few tools I need that I don't have, and commenced tearing the Jeep apart. I'm going to have to hurry with this project now, or it's going to be too cold up here in Connecticut to paint and I'll have to find a place to rent or pay someone else to do it. I don't want to do either one.
Two days after I started, and only 4 or 5 hours of work total, I had the whole body stripped. A couple of guys from work helped me the second day. This project is still going so well that I'm really starting to wonder what's going to go wrong!
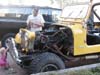
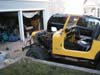
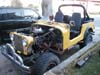
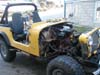
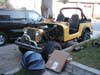
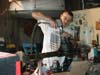
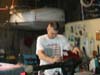
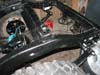
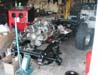
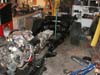
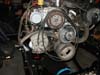
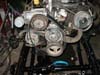
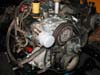
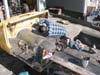
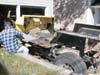
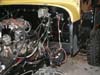
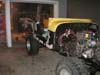
It's now been a few days since the body was ready. Our work schedules haven't allowed us to get started on the body, so I decided to pull the engine, transmission, and transfer case while I waited. I really want to rebuild the engine while it's out, but it hasn't been causing any problems and this project is already costing me a lot of money, so I think I'll wait. It hurts me to think about putting it back in looking like it does, but I think that's what I'm going to do.
Well, it's been a month since I updated this page. In that time I haven't been able to work many days, but I've gotten quite a bit done anyway...
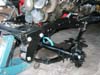
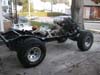
I've rebuilt the front and rear ends, adding Precision Gear 4.10s and ARB Air Lockers. I installed the rear end with the revolver shackles that finally came in from back order at Teraflex, and put regular shackles on the front until I get the full weight on the front end. If the springs never compress enough to get the revolver shackles to work up front, I'll consider drilling new holes in the frame or just selling the shackles to someone who wants 'em.
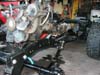
I've installed a York 10 cfm air compressor that I got off a late 70's Volvo at a local junk yard, using a kit from Kilby Enterprises.

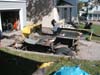
I've gotten the body torn down as far as it's going to go,

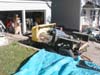
and replaced front floor boards and side panels.


The next step will be to weld the corner panels on and fix the area under the tailgate. Once that's done, the welding will be done and it will be time to prep and paint. Hopefully won't be too long, we're running out of warm weather quickly!
Once again, I've managed to go a couple of weeks without updating! We've worked pretty hard and put in quite a few hours, so take a look at what we've gotten done...
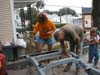
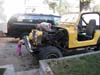
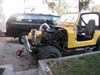
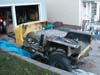
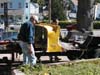
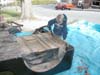
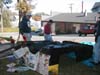
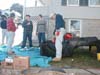
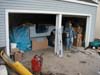
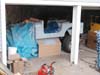
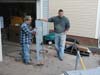
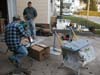
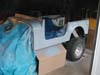
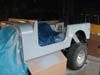
We finished up the welding and rolled the tub off the old frame into my yard for cleanup, then undercoating. My whole family got into the act during the cleanup. I didn't think it was all that great, but my two middle kids had a blast.

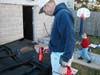
In these pictures you can see me using a hair dryer to dry the undercoating. Several guys from work had come over to help me move it to a trailer after the undercoating, and I was trying to get it dry at the body mount points so I could put them on and have them act as feet for the tub while it made its trip to the Rhino Liner shop.
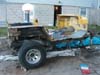
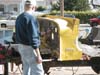
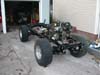
These are just some pictures of the frame the day we did the undercoating. I rolled it out of the garage to take some pictures of it so the camera could "see" it better.
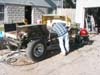
I had to wait a few days for an appointment at the Rhino Lining place, but once they got it, they were done in one day and then the tub was back at my house and placed on the new frame to continue the body work. The Rhino lining was expensive here in Connecticut, but it's something I really thought I wanted to have done. I've seen pickup trucks with Rhino lining in their beds, but had never seen a Jeep done with it. I can tell you my initial impressions are very, very good. I'm very happy I had it done, and can't wait to drive it like this. It's way nicer than the Herculiner or Duraback I've seen, and if I ever have a problem with it they'll fix it for me. Is it worth the extra money? That's a personal call in my opinion, and may not be for everyone.
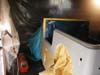
The following are just pictures of the body work as it's progressed. It's moving along pretty smoothly and should be painted within a week. I intend to build a plastic room in my garage to paint the body in when we shoot the final color. I'll let you know how that goes.
Some other things I've done since my last update, that I don't really have great pictures of, are to install the new AGR Super Box 2 and Super Pump, and start the installation of the Painless Wiring harness for CJs.
I don't have any pictures to show you, but we shot a few pieces (windshield, dashboard, and tailgate) with yellow yesterday. I didn't like the color at all. I kept looking at it and thinking that maybe it would be OK once the whole Jeep was done, but couldn't get rid of the feeling that I'd never like it. It reminded me of the pale yellow a little girl's room would be painted in, not something a Jeep should look like. When my wife got home later in the evening, she agreed with me and didn't like it either. She said it would be better to spend the money to buy more paint than live with something we hated for the next 10 years or so.
Today (Saturday) we took the gallon of paint back to the paint shop with a piece of sheet metal from the old Jeep. For a $20 fee they're going to work on trying to match what it used to look like. They were out of a tint they needed today, so I'll go back on Tuesday and see what they've been able to do. We've still got to get the hood and grill prep finished before we're really ready to paint, so it's not going to cause a delay in the project. Hopefully we'll be a lot more happy with what they're able to do for me.
By the way, in case you're interested, I'm using DuPont brand Imron paint. I don't know anything about paints, but my friend doing the body work for me says the polyurethane paint is super tough and durable and I'll be able to buff out the scratches I get while I'm off road if I choose to. I kind of liked the scratches I put on the old Jeep, but I can see there might come a time I'd want to buff out a really bad one.... maybe.
Well, we did it. We finally shot some color, and it looks good!! Neither one of us can really remember what the date was when we started the body work portion of this project. It feels like a long time ago to me, but it's really only been a couple of months at the most, so I think we've done pretty well.
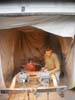
If you take a look at the pictures, you'll be able to see a little of the tent we built in the garage. Also notice the kerosene heater we used to preheat both the air and the sheetmetal. We also wetted down the floor prior to painting. The whole setup worked pretty well, and after only an hour or so worth of prep this morning, we shot 3 coats of paint (I held the air hose!) in about 3 hours. Not a bad days work.

Man, what a great color of yellow it turned out to be. It's going to look great when I've got all the black trim on it, and I'm very, very happy with how it looks. I'm also happy with the paint job. If you ever need a body man, just give me a call and I'll give you his name and home phone number. He's inexpensive (today only cost me two Mountain Dews... he even brought his own lunch over!) and he knows what he's doing with sheetmetal.

The next step will be to move the body out of the garage and move all the smaller parts in. We'll paint a few black, fix two dents in the hood, then paint the rest of the yellow. We plan to have it done in two more days of work over the next 4 days. I'll let you know how it goes.
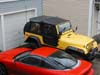
It took us a little longer than four days because of rain, but we're finally done painting all the yellow. Here's a few pics of the body after we moved it out of the garage and some of the prep work on the other pieces.
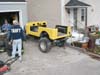
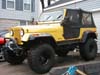
After letting the paint cure for a few days and waiting for more rain to stop, I put the front sheet metal back on. It's starting to look like a Jeep again, and it looks great!

Since these pictures were taken, I've been working a few hours a day putting it all back together. I'm working on the wiring harness and dual battery setup right now. As I get stuff done that's worth taking pictures of, I'll get some and update you here.
Well... Once again I've proven that I'm not very good at doing regular updates. It's now 2003 and I've gone many weeks without an update. The truth is, I spent about 8 of the last 12 weeks or so not working on the Jeep. I was working third shift at work and did not have the energy or desire to go work in the garage when I got home between 9:30 and 11:00 in the mornings.
I did however, spend almost every daylight hour of my Christmas break working in it! I barely saw my family between the time I'd wake up and 4:30 or 5:00 every day. They didn't complain much, so either they're very supportive, they've gotten used to me being out in the garage, or they just didn't want to see me and were actually glad I was in the garage and not the house!
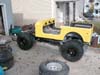
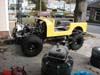
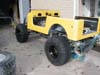
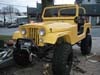
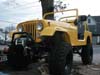
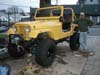
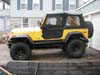
As you can see from the pictures below, the Jeep is mostly together now and has moved out of the garage. I wish I'd been better at taking pictures of the progress as I went along, but I always forget everything except what I'm working on while I'm in the garage. I honestly wouldn't have even eaten lunch most days if my wife didn't bring something out to me and tell me it was time to eat.
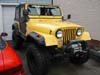
I plan to go back and take pictures of some of what I got done, but here's a short list of what I did before I moved it outside:
That's all I can remember now off the top of my head. The first day I started it up (with no mufflers!) it ran like a champ until it heated up and the old radiator started spraying steam. The next day I got a new one from a local shop in town and installed it.
Since then,
I've had to fix:
I still need to fix:
I'm still waiting for my full cage to be delivered, and will probably be working for another month or two to finish everything up. Once I get the electrical system to charge the batteries, I plan to slow down significantly and only work a few days a week. I'm tired of working on the project every spare minute and want to come inside and just be lazy sometimes after work. I also want to practice some welding and try to improve my skills.
I don't know for sure when I'll take it offroad, but I can't imagine waiting too long to see what it will do. I'm thinking right now that I'd like to drive it back and forth to work for a few days just to see if anything else breaks or if I find other problems before I go offroad, but we'll see!